![]()
In OpenStack all-in-one configuration all OpenStack nodes (controller node, compute node, network node) are installed on a single machine. All in one configuration can be quickly deployed for testing purposes and is often recommended for developers to test their applications on top of OpenStack environment.
In this tutorial we install OpenStack Newton release from RDO repository including Heat Orchestration service on single node (all-in-one installation) based on CentOS 7 / RHEL 7 using packstack installer script.
Environment:
- public network (Floating IP network): 192.168.2.0/24
- public network gateway: 192.168.2.1
- node IP: 192.168.2.26
- node OS: CentOS 7.3.1611 64bit
- node hardware: 2GHz CPU / 4GB RAM / 1 NIC
- OpenStack release: Newton
Preliminary network setup on the node before OpenStack installation:
[root@allinone ~]# ip a
1: lo:  mtu 65536 qdisc noqueue state UNKNOWN
    link/loopback 00:00:00:00:00:00 brd 00:00:00:00:00:00
    inet 127.0.0.1/8 scope host lo
       valid_lft forever preferred_lft forever
    inet6 ::1/128 scope host
       valid_lft forever preferred_lft forever
2: eth0:  mtu 1500 qdisc pfifo_fast state UP qlen 1000
    link/ether 52:54:00:b6:41:8a brd ff:ff:ff:ff:ff:ff
    inet 192.168.2.26/24 brd 192.168.2.255 scope global dynamic eth0
       valid_lft 83092sec preferred_lft 83092sec
    inet6 2a01:112f:5d4:6b00:5054:ff:feb6:418a/64 scope global noprefixroute dynamic
       valid_lft 881sec preferred_lft 281sec
    inet6 fe80::5054:ff:feb6:418a/64 scope link
       valid_lft forever preferred_lft forever
[root@allinone ~]# ip route show
default via 192.168.2.1 dev eth0
169.254.0.0/16 dev eth0 scope link metric 1002
192.168.2.0/24 dev eth0 proto kernel scope link src 192.168.2.26[root@allinone ~]# cat /etc/resolv.conf
nameserver 8.8.8.8
nameserver 8.8.4.4Steps:
1. Update the system
[root@allinone ~]# yum update2. Install RDO repository
[root@allinone ~]# yum install https://repos.fedorapeople.org/repos/openstack/openstack-newton/rdo-release-newton-4.noarch.rpm3. Install packstack (automated OpenStack installer) for OpenStack Newton release
[root@allinone ~]# yum install openstack-packstack4. Stop and disable NetworkManager
[root@allinone ~]# systemctl stop NetworkManager[root@allinone ~]# systemctl disable NetworkManagerNote: at the time of writing this article mariadb-common-3:10.1.18-3.el7.x86_64 package conflicts with file from package mariadb-libs-1:5.5.52-1.el7.x86_64 on CentOS 7.3.1611, so we need to remove the problematic package, before we proceed with packstack installation (this will also remove postfix as a dependency package):
[root@allinone ~]# yum erase mariadb-libs5. Launch OpenStack Newton packstack automated installation with parameters
[root@allinone ~]# packstack --allinone --provision-demo=n --os-heat-install=yNote: in this installation we decided not to install demo tenant, as it’s better for us to create our own project tenant after OpenStack installation
Installation takes about 1 hour (depends strictly on used hardware):
Welcome to the Packstack setup utility

The installation log file is available at: /var/tmp/packstack/20161218-232752-v1bJFK/openstack-setup.log
Packstack changed given value  to required value /root/.ssh/id_rsa.pub

Installing:
Clean Up                                             [ DONE ]
Discovering ip protocol version                      [ DONE ]
Setting up ssh keys                                  [ DONE ]
Preparing servers                                    [ DONE ]
Pre installing Puppet and discovering hosts' details [ DONE ]
Preparing pre-install entries                        [ DONE ]
Setting up CACERT                                    [ DONE ]
Preparing AMQP entries                               [ DONE ]
Preparing MariaDB entries                            [ DONE ]
Fixing Keystone LDAP config parameters to be undef if empty[ DONE ]
Preparing Keystone entries                           [ DONE ]
Preparing Glance entries                             [ DONE ]
Checking if the Cinder server has a cinder-volumes vg[ DONE ]
Preparing Cinder entries                             [ DONE ]
Preparing Nova API entries                           [ DONE ]
Creating ssh keys for Nova migration                 [ DONE ]
Gathering ssh host keys for Nova migration           [ DONE ]
Preparing Nova Compute entries                       [ DONE ]
Preparing Nova Scheduler entries                     [ DONE ]
Preparing Nova VNC Proxy entries                     [ DONE ]
Preparing OpenStack Network-related Nova entries     [ DONE ]
Preparing Nova Common entries                        [ DONE ]
Preparing Neutron LBaaS Agent entries                [ DONE ]
Preparing Neutron API entries                        [ DONE ]
Preparing Neutron L3 entries                         [ DONE ]
Preparing Neutron L2 Agent entries                   [ DONE ]
Preparing Neutron DHCP Agent entries                 [ DONE ]
Preparing Neutron Metering Agent entries             [ DONE ]
Checking if NetworkManager is enabled and running    [ DONE ]
Preparing OpenStack Client entries                   [ DONE ]
Preparing Horizon entries                            [ DONE ]
Preparing Swift builder entries                      [ DONE ]
Preparing Swift proxy entries                        [ DONE ]
Preparing Swift storage entries                      [ DONE ]
Preparing Heat entries                               [ DONE ]
Preparing Heat CloudFormation API entries            [ DONE ]
Preparing Gnocchi entries                            [ DONE ]
Preparing MongoDB entries                            [ DONE ]
Preparing Redis entries                              [ DONE ]
Preparing Ceilometer entries                         [ DONE ]
Preparing Aodh entries                               [ DONE ]
Preparing Nagios server entries                      [ DONE ]
Preparing Nagios host entries                        [ DONE ]
Preparing Puppet manifests                           [ DONE ]
Copying Puppet modules and manifests                 [ DONE ]
Applying 192.168.2.26_controller.pp
192.168.2.26_controller.pp:                          [ DONE ]
Applying 192.168.2.26_network.pp
192.168.2.26_network.pp:                             [ DONE ]
Applying 192.168.2.26_compute.pp
192.168.2.26_compute.pp:                             [ DONE ]
Applying Puppet manifests                            [ DONE ]
Finalizing                                           [ DONE ]

 **** Installation completed successfully ******

Additional information:
 * A new answerfile was created in: /root/packstack-answers-20161218-232753.txt
 * Time synchronization installation was skipped. Please note that unsynchronized time on server instances might be problem for some OpenStack components.
 * File /root/keystonerc_admin has been created on OpenStack client host 192.168.2.26. To use the command line tools you need to source the file.
 * To access the OpenStack Dashboard browse to http://192.168.2.26/dashboard .
Please, find your login credentials stored in the keystonerc_admin in your home directory.
 * To use Nagios, browse to http://192.168.2.26/nagios username: nagiosadmin, password: 5a90918a19ba4c9a
 * Because of the kernel update the host 192.168.2.26 requires reboot.
 * The installation log file is available at: /var/tmp/packstack/20161218-232752-v1bJFK/openstack-setup.log
 * The generated manifests are available at: /var/tmp/packstack/20161218-232752-v1bJFK/manifests
6. Post installation quick test
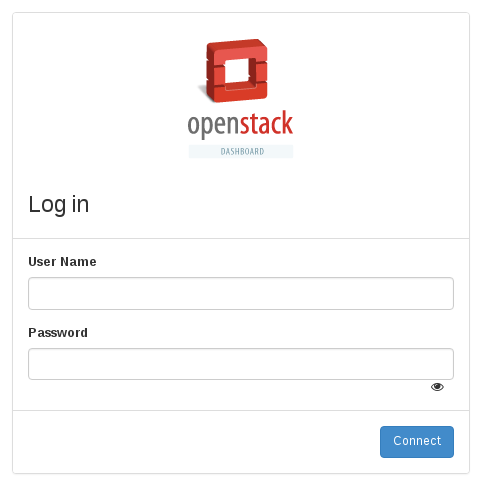
Now it’s time to briefly test our installation and check, if OpenStack Dashboard (Horizon) works properly. Let’s try to login to Horizon using all-in-one node’s IP address. Type the following address in your web browser:
http://192.168.2.26/dashboardIf the installation was successful, you should see the dashboard (Horizon) login screen:
Login and password to the dashboard are written in /root/keystonerc_admin file, generated by packstack upon installation:
[root@allinone ~]# cat /root/keystonerc_admin
unset OS_SERVICE_TOKEN
    export OS_USERNAME=admin
    export OS_PASSWORD=2ecd8d71c2ca4e0f
    export OS_AUTH_URL=http://192.168.2.26:5000/v2.0
    export PS1='[\u@\h \W(keystone_admin)]\$ '

export OS_TENANT_NAME=admin
export OS_REGION_NAME=RegionOne
For our installation credentials are: admin/2ecd8d71c2ca4e0f.
7. Configure network interfaces (bind eth0 interface as a port to OVS bridge br-ex)
Coming back to the console. At this stage (after packstack installation) we have following network interfaces on our all-in-one node:
[root@allinone ~]# ip a
1: lo:  mtu 65536 qdisc noqueue state UNKNOWN qlen 1
    link/loopback 00:00:00:00:00:00 brd 00:00:00:00:00:00
    inet 127.0.0.1/8 scope host lo
       valid_lft forever preferred_lft forever
    inet6 ::1/128 scope host
       valid_lft forever preferred_lft forever
2: eth0:  mtu 1500 qdisc pfifo_fast state UP qlen 1000
    link/ether 52:54:00:b6:41:8a brd ff:ff:ff:ff:ff:ff
    inet 192.168.2.26/24 brd 192.168.2.255 scope global dynamic eth0
       valid_lft 75137sec preferred_lft 75137sec
    inet6 2a01:112f:5d4:6b00:5054:ff:feb6:418a/64 scope global mngtmpaddr dynamic
       valid_lft 894sec preferred_lft 294sec
    inet6 fe80::5054:ff:feb6:418a/64 scope link
       valid_lft forever preferred_lft forever
3: ovs-system:  mtu 1500 qdisc noop state DOWN qlen 1000
    link/ether 86:dc:a9:9a:ed:49 brd ff:ff:ff:ff:ff:ff
4: br-tun:  mtu 1500 qdisc noop state DOWN qlen 1000
    link/ether ee:7b:74:7d:71:4d brd ff:ff:ff:ff:ff:ff
5: br-int:  mtu 1500 qdisc noop state DOWN qlen 1000
    link/ether d2:9a:d4:b9:3e:46 brd ff:ff:ff:ff:ff:ff
6: br-ex:  mtu 1500 qdisc noop state DOWN qlen 1000
    link/ether 82:77:b8:30:7f:4f brd ff:ff:ff:ff:ff:ff
Since br-ex interface is supposed to act as external/public/provider network interface, we need to transfer IP address from eth0 to br-ex and attach eth0 as a port to br-ex in OVS switch.
Backup eth0 interface config file (ifcfg-eth0):
[root@allinone ~]# cp /etc/sysconfig/network-scripts/ifcfg-eth0 /root/ifcfg-eth0.backupCreate br-ex network interface file based on eth0 interface file:
[root@allinone ~]# cp /etc/sysconfig/network-scripts/ifcfg-eth0 /etc/sysconfig/network-scripts/ifcfg-br-exModify ifcfg-eth0 file to look like below:
DEVICE=eth0
ONBOOT=yes
DEVICETYPE=ovs
TYPE=OVSPort
OVS_BRIDGE=br-ex
Modify ifcfg-br-ex file to look like below:
TYPE=Ethernet
BOOTPROTO=none
DEFROUTE=yes
NAME=br-ex
DEVICE=br-ex
ONBOOT=yes
IPADDR=192.168.2.26
PREFIX=24
GATEWAY=192.168.2.1
PEERDNS=no
NM_CONTROLLED=no
Connect eth0 interface as a port to the br-ex bridge interface:
[root@allinone ~]# ovs-vsctl add-port br-ex eth0; systemctl restart networkNote: above command will trigger network restart, so you will lose network connection for a while. The connection should be brought up again, if you modified ifcfg-eth0 and ifcfg-br-ex files correctly.
Verify the final network setup.
IP address is now assigned to br-ex interface:
[root@allinone ~]# ip a
1: lo:  mtu 65536 qdisc noqueue state UNKNOWN qlen 1
    link/loopback 00:00:00:00:00:00 brd 00:00:00:00:00:00
    inet 127.0.0.1/8 scope host lo
       valid_lft forever preferred_lft forever
    inet6 ::1/128 scope host
       valid_lft forever preferred_lft forever
2: eth0:  mtu 1500 qdisc pfifo_fast master ovs-system state UP qlen 1000
    link/ether 52:54:00:b6:41:8a brd ff:ff:ff:ff:ff:ff
    inet6 fe80::5054:ff:feb6:418a/64 scope link
       valid_lft forever preferred_lft forever
3: ovs-system:  mtu 1500 qdisc noop state DOWN qlen 1000
    link/ether 76:07:ea:11:a3:7e brd ff:ff:ff:ff:ff:ff
4: br-tun:  mtu 1500 qdisc noop state DOWN qlen 1000
    link/ether ee:7b:74:7d:71:4d brd ff:ff:ff:ff:ff:ff
5: br-int:  mtu 1500 qdisc noop state DOWN qlen 1000
    link/ether d2:9a:d4:b9:3e:46 brd ff:ff:ff:ff:ff:ff
6: br-ex:  mtu 1500 qdisc noqueue state UNKNOWN qlen 1000
    link/ether 92:1c:7d:4e:82:47 brd ff:ff:ff:ff:ff:ff
    inet 192.168.2.26/24 brd 192.168.2.255 scope global br-ex
       valid_lft forever preferred_lft forever
    inet6 2a01:112f:5d4:6b00:901c:7dff:fe4e:8247/64 scope global mngtmpaddr dynamic
       valid_lft 862sec preferred_lft 262sec
    inet6 fe80::901c:7dff:fe4e:8247/64 scope link
       valid_lft forever preferred_lft forever
Default route is now on br-ex device:
[root@allinone ~]# ip route show
default via 192.168.2.1 dev br-ex
169.254.0.0/16 dev eth0  scope link  metric 1002
169.254.0.0/16 dev br-ex  scope link  metric 1006
192.168.2.0/24 dev br-ex  proto kernel  scope link  src 192.168.2.26
Interface eth0 is now attached as port to br-ex:
[root@allinone ~]# ovs-vsctl show
ae97a3c8-2c09-423f-9da1-6806b968eea1
    Manager "ptcp:6640:127.0.0.1"
        is_connected: true
    Bridge br-ex
        Port br-ex
            Interface br-ex
                type: internal
        Port "eth0"
            Interface "eth0"
    Bridge br-tun
        Controller "tcp:127.0.0.1:6633"
            is_connected: true
        fail_mode: secure
        Port patch-int
            Interface patch-int
                type: patch
                options: {peer=patch-tun}
        Port br-tun
            Interface br-tun
                type: internal
    Bridge br-int
        Controller "tcp:127.0.0.1:6633"
            is_connected: true
        fail_mode: secure
        Port patch-tun
            Interface patch-tun
                type: patch
                options: {peer=patch-int}
        Port br-int
            Interface br-int
                type: internal
    ovs_version: "2.5.0"
8. Verify OpenStack status after packstack installation
In order to check OpenStack cloud status and functionality we need to source keystone file /root/keystonerc_admin created during installation to import OpenStack admin credentials to console session variables:
[root@allinone ~]# source /root/keystonerc_adminList Nova hosts by service:
[root@allinone ~(keystone_admin)]# nova host-list
+-----------+-------------+----------+
| host_name | service     | zone     |
+-----------+-------------+----------+
| allinone  | cert        | internal |
| allinone  | consoleauth | internal |
| allinone  | scheduler   | internal |
| allinone  | conductor   | internal |
| allinone  | compute     | nova     |
+-----------+-------------+----------+
List Nova services by host:
[root@allinone ~(keystone_admin)]# nova service-list
+----+------------------+----------+----------+---------+-------+----------------------------+-----------------+
| Id | Binary           | Host     | Zone     | Status  | State | Updated_at                 | Disabled Reason |
+----+------------------+----------+----------+---------+-------+----------------------------+-----------------+
| 1  | nova-cert        | allinone | internal | enabled | up    | 2016-12-22T22:34:57.000000 | -               |
| 2  | nova-consoleauth | allinone | internal | enabled | up    | 2016-12-22T22:34:56.000000 | -               |
| 5  | nova-scheduler   | allinone | internal | enabled | up    | 2016-12-22T22:34:58.000000 | -               |
| 6  | nova-conductor   | allinone | internal | enabled | up    | 2016-12-22T22:34:56.000000 | -               |
| 7  | nova-compute     | allinone | nova     | enabled | up    | 2016-12-22T22:35:03.000000 | -               |
+----+------------------+----------+----------+---------+-------+----------------------------+-----------------+
List Neutron services by host:
[root@allinone ~(keystone_admin)]# neutron agent-list
+--------------------------------------+--------------------+----------+-------------------+-------+----------------+---------------------------+
| id                                   | agent_type         | host     | availability_zone | alive | admin_state_up | binary                    |
+--------------------------------------+--------------------+----------+-------------------+-------+----------------+---------------------------+
| 186a54ef-8f34-42fb-bd2a-fcaf7013986e | L3 agent           | allinone | nova              | :-)   | True           | neutron-l3-agent          |
| 281f36ac-a284-4f7d-a29c-7d9bf3fb36c2 | DHCP agent         | allinone | nova              | :-)   | True           | neutron-dhcp-agent        |
| 7298c85e-9bbe-4097-98cc-4a61e34b3aa2 | Metadata agent     | allinone |                   | :-)   | True           | neutron-metadata-agent    |
| 77ab4d7c-4003-488e-99ae-fd188ecdf7b4 | Metering agent     | allinone |                   | :-)   | True           | neutron-metering-agent    |
| d9952cb6-f3e5-4898-98b6-8dfafb497b2a | Open vSwitch agent | allinone |                   | :-)   | True           | neutron-openvswitch-agent |
+--------------------------------------+--------------------+----------+-------------------+-------+----------------+---------------------------+
Display OpenStack related services:
[root@allinone ~(keystone_admin)]# systemctl list-unit-files | grep openstack
openstack-aodh-api.service                    disabled
openstack-aodh-evaluator.service              enabled
openstack-aodh-listener.service               enabled
openstack-aodh-notifier.service               enabled
openstack-ceilometer-api.service              disabled
openstack-ceilometer-central.service          enabled
openstack-ceilometer-collector.service        enabled
openstack-ceilometer-compute.service          enabled
openstack-ceilometer-notification.service     enabled
openstack-ceilometer-polling.service          disabled
openstack-cinder-api.service                  enabled
openstack-cinder-backup.service               enabled
openstack-cinder-scheduler.service            enabled
openstack-cinder-volume.service               enabled
openstack-glance-api.service                  enabled
openstack-glance-glare.service                disabled
openstack-glance-registry.service             enabled
openstack-glance-scrubber.service             disabled
openstack-gnocchi-api.service                 disabled
openstack-gnocchi-metricd.service             enabled
openstack-gnocchi-statsd.service              enabled
openstack-heat-api-cfn.service                enabled
openstack-heat-api.service                    enabled
openstack-heat-engine.service                 enabled
openstack-losetup.service                     enabled
openstack-nova-api.service                    enabled
openstack-nova-cert.service                   enabled
openstack-nova-compute.service                enabled
openstack-nova-conductor.service              enabled
openstack-nova-console.service                disabled
openstack-nova-consoleauth.service            enabled
openstack-nova-metadata-api.service           disabled
openstack-nova-novncproxy.service             enabled
openstack-nova-os-compute-api.service         disabled
openstack-nova-scheduler.service              enabled
openstack-nova-xvpvncproxy.service            disabled
openstack-swift-account-auditor.service       enabled
openstack-swift-account-auditor@.service      disabled
openstack-swift-account-reaper.service        enabled
openstack-swift-account-reaper@.service       disabled
openstack-swift-account-replicator.service    enabled
openstack-swift-account-replicator@.service   disabled
openstack-swift-account.service               enabled
openstack-swift-account@.service              disabled
openstack-swift-container-auditor.service     enabled
openstack-swift-container-auditor@.service    disabled
openstack-swift-container-reconciler.service  disabled
openstack-swift-container-replicator.service  enabled
openstack-swift-container-replicator@.service disabled
openstack-swift-container-updater.service     enabled
openstack-swift-container-updater@.service    disabled
openstack-swift-container.service             enabled
openstack-swift-container@.service            disabled
openstack-swift-object-auditor.service        enabled
openstack-swift-object-auditor@.service       disabled
openstack-swift-object-expirer.service        enabled
openstack-swift-object-reconstructor.service  disabled
openstack-swift-object-reconstructor@.service disabled
openstack-swift-object-replicator.service     enabled
openstack-swift-object-replicator@.service    disabled
openstack-swift-object-updater.service        enabled
openstack-swift-object-updater@.service       disabled
openstack-swift-object.service                enabled
openstack-swift-object@.service               disabled
openstack-swift-proxy.service                 enabled
Some of the services are disabled, because we don’t need them in our all-in-one setup, but the Heat Orchestration related services are enabled, as we wanted:
[root@allinone ~(keystone_admin)]# systemctl list-unit-files | grep openstack-heat
openstack-heat-api-cfn.service                enabled
openstack-heat-api.service                    enabled
openstack-heat-engine.service                 enabled
We have finished installing OpenStack Newton All In One with Heat Orchestration Service on CentOS 7.
9. Suggested further steps
Now, when our OpenStack cloud is ready to work, we can try to create Tenant and launch Instances to test, if internal/external connetivity is working. Please refer to this article: Create Tenant in OpenStack and launch Instances.
Hello,
Why you did not mention that user need install ovs bridge package first? It does not work without it. Network service throws “Network is unavailable”. Tested on two different servers. Result is the same.
Hello, of course YOU DON’T NEED to install OVS Bridge before OpenStack based installation, OVS is installed by packstack along with other stuff. How did you come up with this idea that you need to install OVS separately?
Here is my output.
[root@localhost ~]# ovs-vsctl add-port br-ex eth0
ovs-vsctl: no bridge named br-ex
—-as you can see there is an error that bridge is absent, but if ti check network-scripts i see it on the place:
[root@localhost ~]# ls /etc/sysconfig/network-scripts/ | grep “ifcfg*”
ifcfg-br-ex
ifcfg-eth0
ifcfg-lo
Then i tried to add the bridge not manually like it was in your manual with cp ifcfg-etho ifcfg-br-ex:
[root@localhost ~]# ovs-vsctl add-br br-ex
[root@localhost ~]# ls /etc/sysconfig/network-scripts/ | grep “ifcfg*”
ifcfg-br-ex
ifcfg-eth0
ifcfg-lo
as you can see an output is still the same BUT there is no error when i have tried to add port again:
[root@localhost ~]# ovs-vsctl add-port br-ex eth0
[root@localhost ~]# systemctl restart network
[root@localhost ~]# ping 8.8.8.8
PING 8.8.8.8 (8.8.8.8) 56(84) bytes of data.
64 bytes from 8.8.8.8: icmp_seq=1 ttl=45 time=55.9 ms
64 bytes from 8.8.8.8: icmp_seq=2 ttl=45 time=55.5 ms
^C
— 8.8.8.8 ping statistics —
3 packets transmitted, 2 received, 33% packet loss, time 2002ms
rtt min/avg/max/mdev = 55.518/55.736/55.955/0.321 ms
[root@localhost ~]#
Previously i was not able to add the port. That is why i have assumed that i need bridge app for this
But as it turned out the problem was in naming of eth0 network interface. In another manual i have found that one guy tried create bridge with eno-* network interface. But i have not such in my list. ) That is why i again assumed that i need setup some extra packages to be able to add the bridge and port so as i was not able to do it till this moment and got all the time “Network is unavailable” error because of misconfiguration of network interface files. But it is a long story and i still can not understand why do we need add the bridge only after openstack is installed but why we did not do this before that moment? It little bit confuses.
Hi, it looks like a bug that I encountered many times, OVS was installed during packstack installation, so OVS commands are present in the system since packstack execution, but for some reason br-ex was not created in OVS, you have to recreate it manually.
The name of the interface, weather it’s eno or eth depends on you udev rules and how the system recognizes network interfaces.
We need to add bridge to OVS after openstack installation, because that’s when OVS (openvSwitch) is installed, you can not do it before, unless you are not installing whole openstack manually service by service.
Thanks alot..very well documented & presented steps.
Perfectly worked for me on the second attempt. Kudos!
Including Heat orchestration was the best thing.
Alternatively, running packstack –help describes the ability to create br-ex/br-int/br-tun during the initial installation:
packstack –allinone –provision-demo=n –os-heat-install=y –provision-ovs-bridge=y
Yes, most likely you can do it this way, I tried this solution few releases ago and it didn’t work properly, don’t rember the details. Anyway thanx for reminding me about it, maybe I will give it a try in Ocata.
All the installation was done but I can’t access the webinterface. I guess the configuration is using 127.0.0.1 instead machine IP.
How can I change it?
Thanks.
Hi Thiago
To be honest I really doubt it’s using 127.0.0.1. Can you first check from controller if the website is responding?
You can use curl or some command line web browser, i.e.: lynx, please let me know if the dashboard responds locally from controller.
While I find your efforts and those of others very useful, they really need to be updated to more current releases. OVS has now been replaced by OVN as of Pike. Plus Newton, Ocata and Pike are no longer available from the Centos repositories. The oldest version there is now Rocky.
Could you update this blog to reflect these new realities and help all of us new to this out? I really thank you for all your efforts to date.