![]()
In this tutorial we will install OpenStack Liberty release from RDO repository on one node (all-in-one installation) based on CentOS 7 / RHEL 7 using packstack installer script.
In all-in-one configuration all OpenStack nodes (controller node, compute node, network node) are installed on a single machine. This type of configuration can be deployed very easy and fast for testing purposes, also on KVM machines, when no physical hardware is available.
Environment used:
public network (Floating IP network): 192.168.2.0/24
public network gateway: 192.168.2.1
node IP: 192.168.2.32
node OS: CentOS 7.1 64bit OS
node hardware: 2GHz CPU / 4GB RAM / 1 ethernet card
OpenStack version: Liberty
Steps:
1. Update the system
[root@tuxfixer ~]# yum update2. Install RDO repository
[root@tuxfixer ~]# yum install https://repos.fedorapeople.org/repos/openstack/openstack-liberty/rdo-release-liberty-2.noarch.rpm3. Install packstack – automated installer script for OpenStack
[root@tuxfixer ~]# yum install openstack-packstack4. Disable and stop NetworkManager
[root@tuxfixer ~]# systemctl disable NetworkManager[root@tuxfixer ~]# systemctl stop NetworkManager5. Run packstack automated installation
[root@tuxfixer ~]# packstack --allinone --nagios-install=n --provision-demo=nNote: in this installation we do not install nagios monitoring system and demo tenant, because we don’t need them for typical OpenStack operation
Installation takes ~45 minutes:
Welcome to the Packstack setup utility

The installation log file is available at: /var/tmp/packstack/20151227-133235-o40eTo/openstack-setup.log

Installing:
Clean Up                                             [ DONE ]
Discovering ip protocol version                      [ DONE ]
Setting up ssh keys                                  [ DONE ]
Preparing servers                                    [ DONE ]
Pre installing Puppet and discovering hosts' details [ DONE ]
Adding pre install manifest entries                  [ DONE ]
Setting up CACERT                                    [ DONE ]
...
After successful installation we should get the output similar to the below:
...
Applying Puppet manifests                            [ DONE ]
Finalizing                                           [ DONE ]

 **** Installation completed successfully ******

Additional information:
 * File /root/keystonerc_admin has been created on OpenStack client host 192.168.2.32. To use the command line tools you need to source the file.
 * To access the OpenStack Dashboard browse to http://192.168.2.32/dashboard .
Please, find your login credentials stored in the keystonerc_admin in your home directory.
 * Because of the kernel update the host 192.168.2.32 requires reboot.
 * The installation log file is available at: /var/tmp/packstack/20151223-220716-Q7dZ0x/openstack-setup.log
 * The generated manifests are available at: /var/tmp/packstack/20151223-220716-Q7dZ0x/manifests
Test the installation – login to the Horizon (OpenStack Dashboard), type the following in the browser:
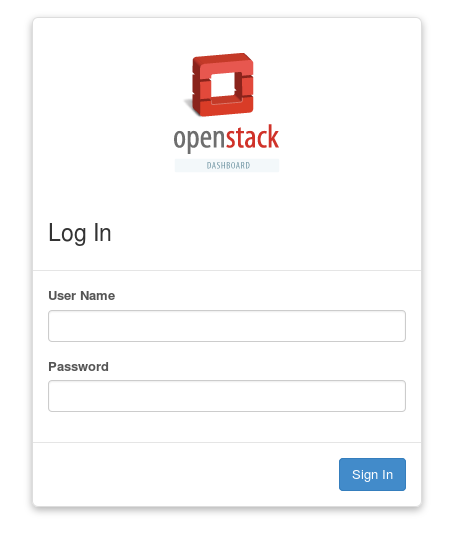
http://192.168.2.32/dashboardYou should see the dashboard (Horizon) login screen:
Login and password to the dashboard are written in /root/keystonerc_admin file, generated by packstack upon installation:
[root@tuxfixer ~]# cat /root/keystonerc_admin
unset OS_SERVICE_TOKEN
export OS_USERNAME=admin
export OS_PASSWORD=1aaf1b58783f4856
export OS_AUTH_URL=http://192.168.2.32:5000/v2.0
export PS1='[\u@\h \W(keystone_admin)]\$ '

export OS_TENANT_NAME=admin
export OS_REGION_NAME=RegionOne
6. Bind physical interface port to OVS Bridge
Let’s go back to the console. At this stage we have following network interfaces on our node:
[root@tuxfixer ~]# ip a
1: lo:  mtu 65536 qdisc noqueue state UNKNOWN
    link/loopback 00:00:00:00:00:00 brd 00:00:00:00:00:00
    inet 127.0.0.1/8 scope host lo
       valid_lft forever preferred_lft forever
    inet6 ::1/128 scope host
       valid_lft forever preferred_lft forever
2: eth0:  mtu 1500 qdisc pfifo_fast state UP qlen 1000
    link/ether 52:54:00:24:e4:75 brd ff:ff:ff:ff:ff:ff
    inet 192.168.2.32/24 brd 192.168.2.255 scope global dynamic eth0
       valid_lft 39065sec preferred_lft 39065sec
    inet6 fe80::5054:ff:fe24:e475/64 scope link
       valid_lft forever preferred_lft forever
3: ovs-system:  mtu 1500 qdisc noop state DOWN
    link/ether a6:1d:fc:76:6e:c0 brd ff:ff:ff:ff:ff:ff
4: br-int:  mtu 1500 qdisc noop state DOWN
    link/ether 96:e4:fd:48:5d:46 brd ff:ff:ff:ff:ff:ff
5: br-ex:  mtu 1500 qdisc noqueue state UNKNOWN
    link/ether 2e:8f:71:14:20:48 brd ff:ff:ff:ff:ff:ff
    inet6 fe80::2c8f:71ff:fe14:2048/64 scope link
       valid_lft forever preferred_lft forever
Backup eth0 interface config file (ifcfg-eth0):
[root@tuxfixer ~]# cp /etc/sysconfig/network-scripts/ifcfg-eth0 /root/ifcfg-eth0.backupCreate br-ex network interface file based on eth0 interface:
[root@tuxfixer ~]# cp /etc/sysconfig/network-scripts/ifcfg-eth0 /etc/sysconfig/network-scripts/ifcfg-br-exModify ifcfg-eth0 file to look like below:
DEVICE=eth0
HWADDR=52:54:00:24:e4:75
ONBOOT=yes
Modify ifcfg-br-ex file to look like below:
DEVICE=br-ex
TYPE=Ethernet
BOOTPROTO=static
NM_CONTROLLED=no
ONBOOT=yes
IPADDR=192.168.2.32
PREFIX=24
Modify /etc/sysconfig/network file to look like below:
NETWORKING=yes
GATEWAY=192.168.2.1
Connect eth0 interface as a port to the br-ex bridge interface.
[root@tuxfixer ~]# ovs-vsctl add-port br-ex eth0; systemctl restart networkNote: above command will trigger network restart, so you will lose network connection for a while. The connection should be brought up again, if you modified ifcfg-eth0 and ifcfg-br-ex files correctly.
Verify, that eth0 port was connected to br-ex:
[root@tuxfixer ~]# ovs-vsctl show
bbf803eb-e596-40d4-8188-05da72d7ba46
    Bridge br-int
        fail_mode: secure
        Port patch-tun
            Interface patch-tun
                type: patch
                options: {peer=patch-int}
        Port br-int
            Interface br-int
                type: internal
    Bridge br-ex
        Port br-ex
            Interface br-ex
                type: internal
        Port "eth0"
            Interface "eth0"
    Bridge br-tun
        fail_mode: secure
        Port patch-int
            Interface patch-int
                type: patch
                options: {peer=patch-tun}
        Port br-tun
            Interface br-tun
                type: internal
    ovs_version: "2.4.0"
Verify default route via br-ex interface:
[root@tuxfixer ~]# ip route show
default via 192.168.2.1 dev br-ex
169.254.0.0/16 dev eth0  scope link  metric 1002
169.254.0.0/16 dev br-ex  scope link  metric 1005
192.168.2.0/24 dev br-ex  proto kernel  scope link  src 192.168.2.32
7. Verify OpenStack status after installation
Time to check our new OpenStack cloud status and functionality. Source keystone file (keystonerc_admin) created in /root directory during installation to import OpenStack admin credentials to console session variables:
[root@tuxfixer ~]# source /root/keystonerc_adminCheck OpenStack status:
[root@tuxfixer ~(keystone_admin)]# openstack-status
== Nova services ==
openstack-nova-api:                     active
openstack-nova-cert:                    active
openstack-nova-compute:                 active
openstack-nova-network:                 inactive  (disabled on boot)
openstack-nova-scheduler:               active
openstack-nova-conductor:               active
...Note: if neutron-openvswitch-agent service is in failed state, then start the service:
[root@tuxfixer ~(keystone_admin)]# systemctl start neutron-openvswitch-agent…otherwise you could encounter “No valid host was found. There are not enough hosts available” error, when trying to create instance(s).
Verify host list:
[root@tuxfixer ~(keystone_admin)]# nova-manage host list
host                     	zone
tuxfixer                 	internal
Verify running services on host:
[root@tuxfixer ~(keystone_admin)]# nova-manage service list
Binary            Host      Zone       Status     State   Updated_At
nova-consoleauth  tuxfixer  internal   enabled    ':-)'   2015-12-27 13:53:25
nova-scheduler    tuxfixer  internal   enabled    ':-)'   2015-12-27 13:53:32
nova-conductor    tuxfixer  internal   enabled    ':-)'   2015-12-27 13:53:23
nova-compute      tuxfixer  nova       enabled    ':-)'   2015-12-27 13:53:27
nova-cert         tuxfixer  internal   enabled    ':-)'   2015-12-27 13:53:29
That’s all, you have just learned how to install Openstack Liberty all in one on CentOS 7.
Find out, how to Create Project Tenant in OpenStack and launch instances.
Thanks a lot! Can I still use your KVM for OpenStack article for this -> http://tuxfixer.com/install-openstack-on-kvm-how-to-configure-kvm-for-openstack/ ?
Yes, you can use KVM article, but for all in one (one node) installation you need only one interface on virtual machine: eth0 – bridged to hypervisor’s bridge. Don’t create second interface: eth1 based on virbr0, it’s not needed.
Throwing RDO Repo not found error.
https://repos.fedorapeople.org/repos/openstack/openstack-liberty/rdo-release-liberty-2.noarch.rpm
I am not surprised since Liberty went End Of Life a long time ago.
Choose one of the supported versions here, or go to EOL subfolder for Liberty:
https://repos.fedorapeople.org/repos/openstack/
Preparing servers [ ERROR ]
ERROR : Failed to run remote script, stdout:
stderr: Warning: Permanently added ‘192.99.74.229’ (ECDSA) to the list of known hosts.
WARNING: Your password has expired.
Password change required but no TTY available.
Please check log file /var/tmp/packstack/20160202-143230-NHQXG_/openstack-setup.log for more information
Additional information:
* A new answerfile was created in: /root/packstack-answers-20160202-143231.txt
* Time synchronization installation was skipped. Please note that unsynchronized time on server instances might be problem for some OpenStack components.
please help me!
Hi, try to add couple of NTP servers to your answer file:
CONFIG_NTP_SERVERS=0.pool.ntp.org,1.pool.ntp.org,2.pool.ntp.org
and then retry the installation.
Hey
How do i connect muliti server with a openstack?
That mean, Dedicated servers 1,2,3,4…. connect a openstack horizon
Hi Du, I didn’t get your problem.
Do you want to attach 4 dedicated servers to OpenStack installation as Nova Compute Servers?
You can do it by setting those servers’ IPs in answer file as follows:
# The list of IP addresses of the server on which to install the Nova,,,
# compute service
CONFIG_COMPUTE_HOSTS=
example:
CONFIG_COMPUTE_HOSTS=192.168.2.5,192.168.2.6,192.168.2.7,192.168.2.8
You can change existing openstack configuration by re-running packstack with the modified answers.txt file, packstack will install services on new nodes using built-in puppet script.
Don’t forget to exclude already configured servers/nodes (i.e .controller) from being modified by packstack installer by setting:
# Comma separated list of servers to be excluded from installation in
# case you are running Packstack the second time with the same answer
# file and don’t want Packstack to touch these servers. Leave plain if
# you don’t need to exclude any server.
EXCLUDE_SERVERS=
example:
EXCLUDE_SERVERS=192.168.2.4
where 192.168.2.4 is controller IP and you don’t want to touch/modify controller during re-configuration of cloud.
yes, you are right!
i have problem with RDO install openstack
my virtual machine have Floating IP :128.136.179.117 and Private IP :192.168.0.8
after Installation completed successfully, System access requirements Private IP :http://192.168.0.8/dashboard when i acceess 128.136.179.117/dashboard not working
error :404 not found
Can you help me?
You will not connect to dashboard via virtual machine (instance) IP, neither internal nor Floating. You need to access dashboard via controller ip:
http://controller_ip/dashboard
Hi Admin my centos 7 show me interface name enp8s0 not eth0 ..so what i do
… so you do on enp8s0 🙂
It doesn’t matter what is the interface name, just ensure that enp8s0 is the interface you will use for external/provider/public network and will be OK.
After rebooting the server:
http://controller_ip/dashboard
gives me 404 Not Found
any idea ????
# systemctl enable openstack-ceilometer-api.service openstack-ceilometer-notification.service \
openstack-ceilometer-central.service openstack-ceilometer-collector.service \
openstack-ceilometer-alarm-evaluator.service openstack-ceilometer-alarm-notifier.service
# systemctl start openstack-ceilometer-api.service openstack-ceilometer-notification.service \
openstack-ceilometer-central.service openstack-ceilometer-collector.service \
openstack-ceilometer-alarm-evaluator.service openstack-ceilometer-alarm-notifier.service
I am having problem while running of puppet
Error appeared during Puppet run: 192.168.130.132_amqp.pp
Error: Execution of ‘/usr/bin/yum -d 0 -e 0 -y install erlang’ returned 1: Error: Package: erlang-odbc-R16B-03.0.el7.x86_64 (openstack-liberty)
You will find full trace in log /var/tmp/packstack/20160312-153112-pembCu/manifests/192.168.130.132_amqp.pp.log
how to solve this?
Hi, try to execute the command manually:
[root@tuxfixer ~]# /usr/bin/yum -d 0 -e 0 -y install erlang
… it should give you the info about the problem it encountered.
Perhaps you have some unresolved dependencies – some missing rpms, that openstack can’t install itself and you will have to download and install them manually.
Hi
How do install openstack on VPS one NIC
You know, VPS jus have one NIC
On VPS you install in the same way as on bare metal / real hardware.
You just need to verify if your hosting provider allows OpenStack on his VPSes and if it’s even possible regarding hosting backend architecture (to install OpenStack on already virtualized VPS server).
i follow your post but after restart network ,i do not access or connect it
Could you please post me how to create openstack network should communicate to external or outside network….
hi,
if i want install openstack like your post whats is minimum requirements?so i can create VM on the openstack?
Thx.
Hi Fadloli
For me the absolute minimum for all-in-one installation would be:
RAM: 2GB
DISK: ~ 20GB
CPU: ~ 2GHz
with the above configuration you still will be able to launch one maybe two small cirrros (http://download.cirros-cloud.net/0.3.4/cirros-0.3.4-x86_64-disk.img) based VM with for example 64MB of allocated RAM.
If you want to launch CentOS or RedHat based images you will need more resources (CPU, RAM, DISK) to let those VMs work properly.
after finishing the installation, i must have an internet connection to access the dashboard. what should i do to make it as an offline server? please help me. thanks before.
Hi Josefh
Install web browser (along with some Desktop Manager) on the server where OpenStack is installed and connect as localhost:
http://localhost/dashboard
It works for me.
Hi,
I’m currently deploying our OpenStack platform (Liberty based):
1 physical host holding controller, network, storage and compute node
1 physical host holding compute node .
I plan to run the following command ( from the controller/compute node) to achieve it :
# packstack –answer-file=/root/answer.txt
with following contents in answer.txt :
….
CONFIG_CONTROLLER_HOST=10.128.59.97
# List the servers on which to install the Compute service.
CONFIG_COMPUTE_HOSTS=10.128.59.97, 10.128.59.96 …
…..
Am I right ?
In another hand, I’m wondering where I’ve to do the “networking bridging ” modifications with this two nodes config ?
Thx for help.
Regards,
J.P.
I see you added eth0 interface as a port in br-ex bridge interface, but isn’t you also need the following entries in your network scripts?
ifcfg-eth0:
TYPE=OVSPort
OVS_BRIDGE=br-ex
ifcfg-br-ex:
DEVICETYPE=ovs
TYPE=OVSBridge
Hi
Those parameters are not critical for the OpenStack Neutron and OVS to work, so I don’t usually use them.
do you have a similar guide Mitaka
Regarding Mitaka I have only one tutorial so far:
http://www.tuxfixer.com/install-and-integrate-openstack-mitaka-on-centos-7-with-glusterfs-cinder-volume-backend/
I am working now on: “Mitaka All-in-one Installation” tutorial.
I followed your tuto but here is the error that I have
ERROR : Error appeared during Puppet run: 10.156.41.30_keystone.pp
Error: Could not start Service[httpd]: Execution of ‘/usr/bin/systemctl start httpd’ returned 1: Job for httpd.service failed because the control process exited with error code. See “systemctl status httpd.service” and “journalctl -xe” for details.
Help me please
Hi
Try to start/restart service manually:
systemctl start httpd
systemctl restart httpd
Then display the status of httpd:
systemctl status httpd.service
and check if there are still any errors.
Hi i tried to manually start the service:
But here is what he gives me as result
Job for httpd.service failed because the control process exited with error code. See “systemctl status httpd.service” and “journalctl -xe” for details.
â httpd.service – The Apache HTTP Server
Loaded: loaded (/usr/lib/systemd/system/httpd.service; disabled; vendor preset: disabled)
Active: failed (Result: exit-code) since mer. 2016-12-07 09:46:31 GMT; 7min ago
Docs: man:httpd(8)
man:apachectl(8)
Process: 10871 ExecStop=/bin/kill -WINCH ${MAINPID} (code=exited, status=1/FAILURE)
Process: 10869 ExecStart=/usr/sbin/httpd $OPTIONS -DFOREGROUND (code=exited, status=1/FAILURE)
Main PID: 10869 (code=exited, status=1/FAILURE)
For the status display httpd here is the result
â httpd.service – The Apache HTTP Server
Loaded: loaded (/usr/lib/systemd/system/httpd.service; disabled; vendor preset: disabled)
Active: failed (Result: exit-code) since mer. 2016-12-07 09:46:31 GMT; 7min ago
Docs: man:httpd(8)
man:apachectl(8)
Process: 10871 ExecStop=/bin/kill -WINCH ${MAINPID} (code=exited, status=1/FAILURE)
Process: 10869 ExecStart=/usr/sbin/httpd $OPTIONS -DFOREGROUND (code=exited, status=1/FAILURE)
Main PID: 10869 (code=exited, status=1/FAILURE)
Hi
Unfortunately this output doesn’t give any information.
Maybe launch “journalctl -f” on one console and restart httpd on another console and check if you are getting some reliable information from journalctl.
HI
I used the journalctl -f on one console and restart httpd on another console but still httpd.service failed
Hello
I installed openstack mitaka
But if I click on one of its elements (image, network, instances, volumes, router etc …)
Here is the error that I have:
Error: Could not retrieve usage information.
Help me …
Hi
It looks like a database error, because it can not retrieve any information, maybe check if your database is working properly, check if you can connect to your database manually, check if maria db is running, etc..
That’s all what comes to my mind right now, honestly.
Did you check any logs on any node?
There must be some trace of this failure somewhere in the logs.
I would start from searching logs from keystone, since it’s strictly connected with maria db.
I create a vm but if I click log here is the error message it gives me Unable to retrieve the log for instance “b2c8fbea-c063-4737-a886-521456f92dbd”.
help me
Hi
Check OpenStack all-in-one node logs, not instance (vm) logs.
Hello i cree a vm cirros on openstack mitaka it gives me as login cirros and password cubswin 🙂 by default but I can not find in my keyboard the characters 🙂 help me change the password on command line a From my server or find its characters on my keyboard azerty
Hello
I cree a vm cirros on openstack mitaka it gives me as login cirros and password cubswin : ) by default but I can not find in my keyboard the characters : ) help me change the password on command line a From my server or find its characters on my keyboard azerty
I recently installed OpenStack Mitaka on my benchmark and imported few images from the CentOS, Cirros and Ubuntu repositories. After the virtual machine started, I tried to connect through the VNC console. Unfortunately, I did not know the username and password and the information was not available on the page where the image was downloaded. How I should do to set the username and password
Hi
For Cirros images credentials are well known: cirros / cubswin:) – you even have it written when you check console log from the booting instance.
For Ubuntu image, as far as I know, the login account is ubuntu, but the password is disabled, since many of the image vendors disable SSH password authentication by default, so you have to boot the image with an injected key pair. You can easily generate and download key-pair when launching instance in Horizon dashboard and then you have to login to the Instance using downloaded key, example:
ssh -i path_to_key_file ubuntu@instance_floating_ip
I hope it helped
Thank you Grzegorz Juszczak
I acceded to the vm cirros which but I do not manage to acceder the Internet I made an ifconfig but I do not see IP address on the vm and for so I had added address Ip floating when creating the vm. I also created a router but on the second interface of the router it puts me down. I also managed to ping the address of this interface via my physical machine.
help me
Hi Grzegorz,
During installation I am facing some problem as listed below:
1. Liberty rdo package v 2 not found. It is updated to v 5. Will it create any problem?
2. During Testing if puppet……. step I got the error with aodhclient pckage not found. Can u pls help me?
Hi Arijit
I see the link to v2 is removed now as obsolete, so you need to download and install v5 – you have no other option by the way. It’s upgraded package so it shouldn’t cause any problems and still this tutorial should be relevant for v5 installation, although I haven’t tested for v5.
Regarding the missing package, can you paste the corresponding part of the log showing the missing package error?